Single Sign On (SSO)
Enigma SSO is compatible with any SAML 2.0 identity provider, such as Okta or Active Directory Federation Services.
For illustrative purposes, the following step-by-step details how to configure Okta as a SAML provider for the Enigma Console.
Configure Okta Part 1
-
- Click on “Browse App Catalog

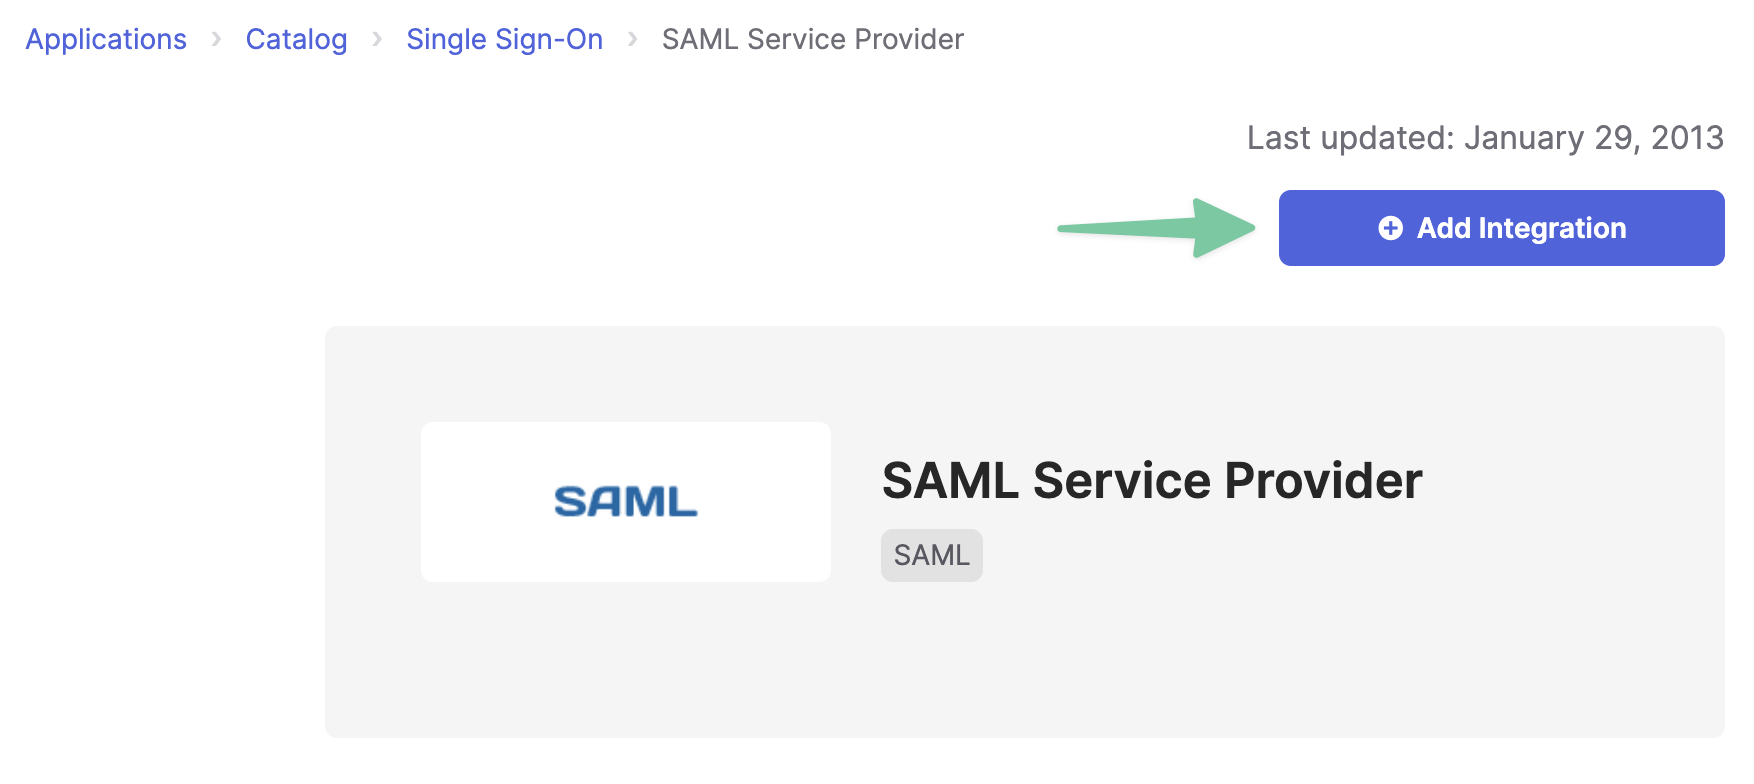
- Select “SAML Service Provider”
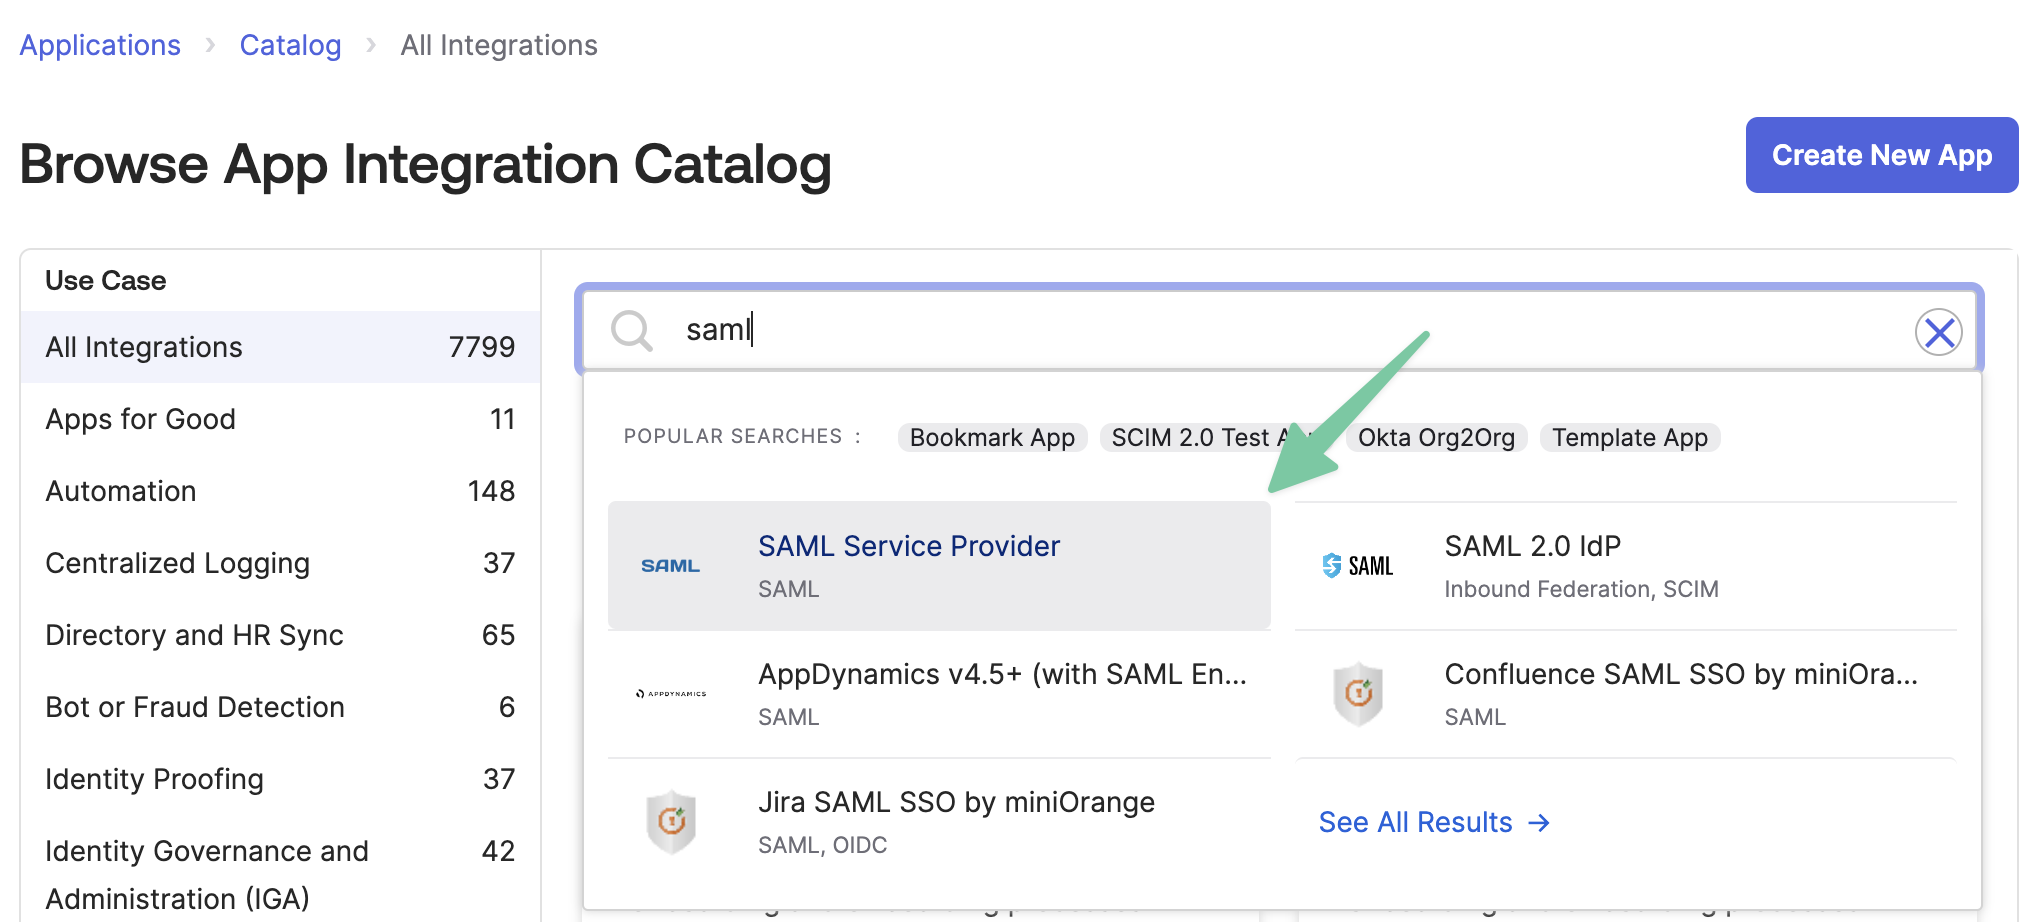
- Click “Add Integration”
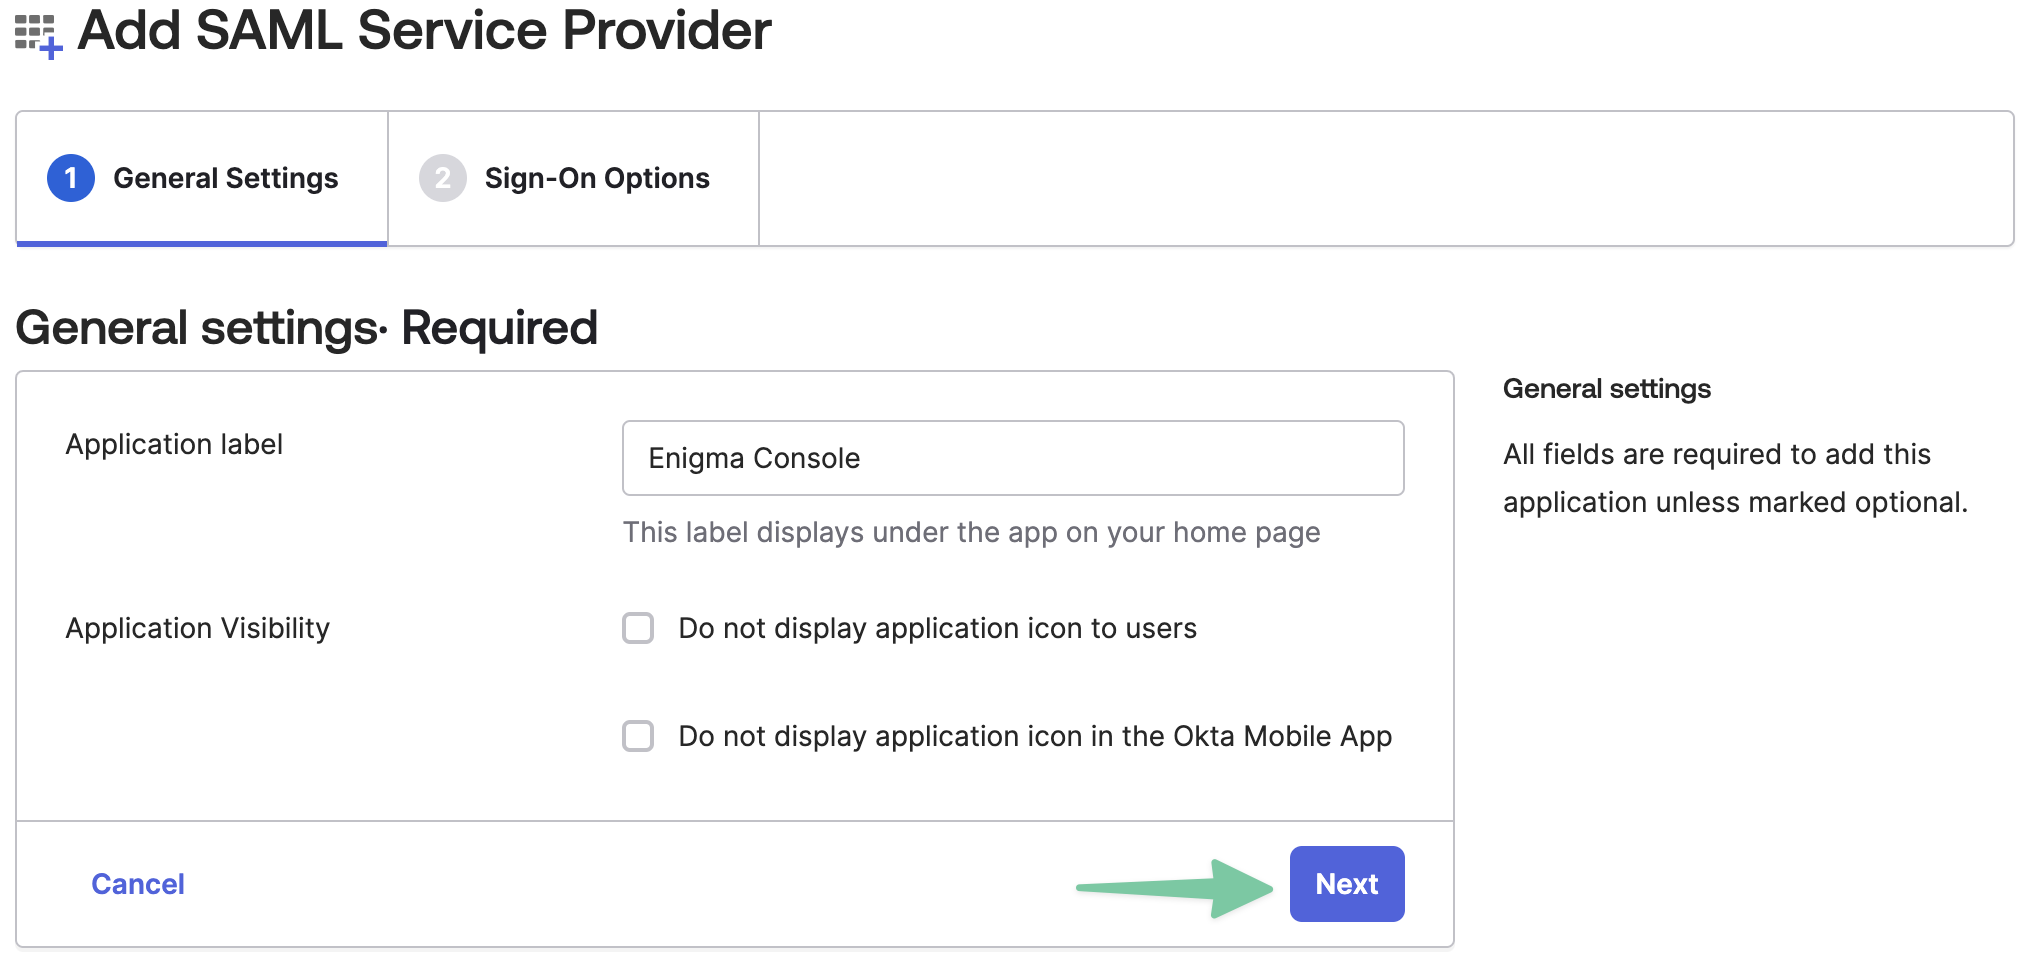
- Complete setup wizard for the SAML app
-
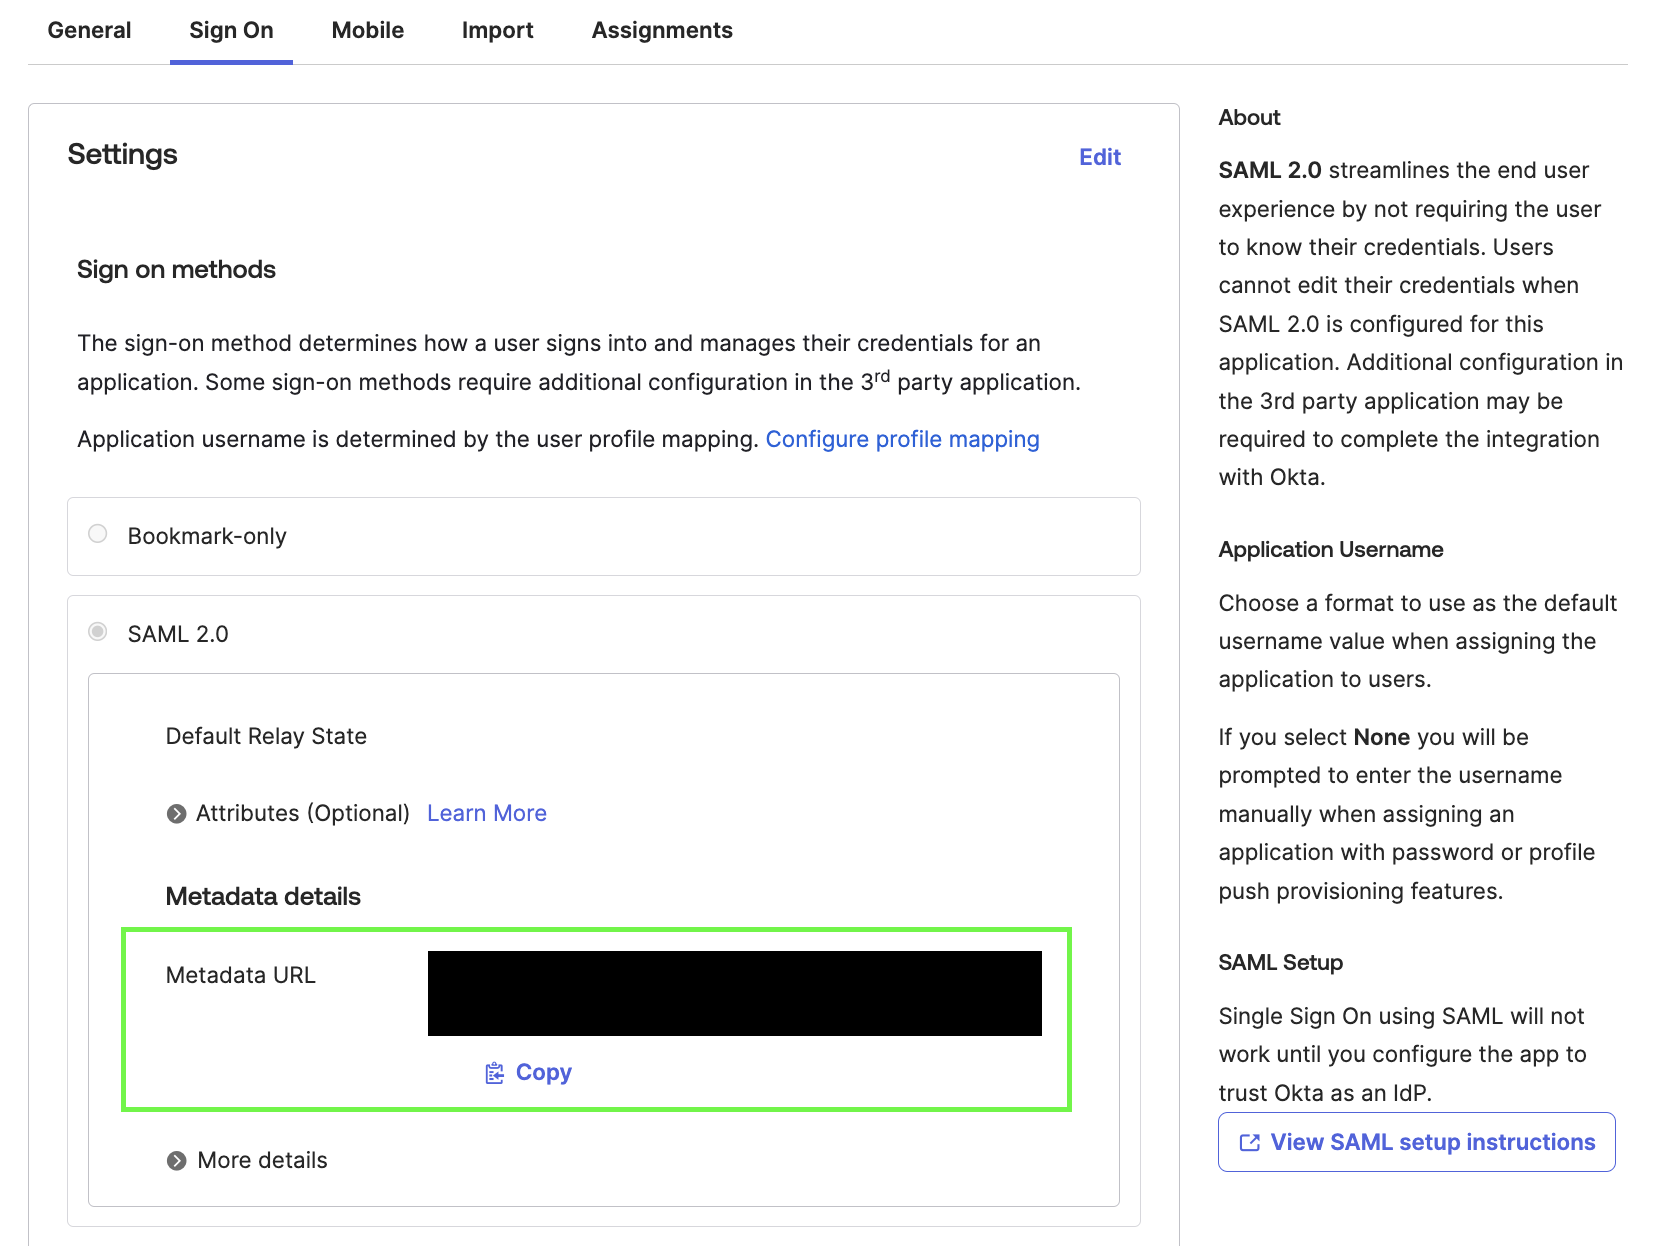
Navigate to the SAML app and make note of the “Metadata URL”. This will be used later when onboarding to the Enigma Console
- Keep this tab open; you will be returning to it later.
Configure Enigma Console
- Login to the Console using standard sign-in (username + password)
- Go to https://console.engima.com/organization
- Click on “Configure Identity Provider”
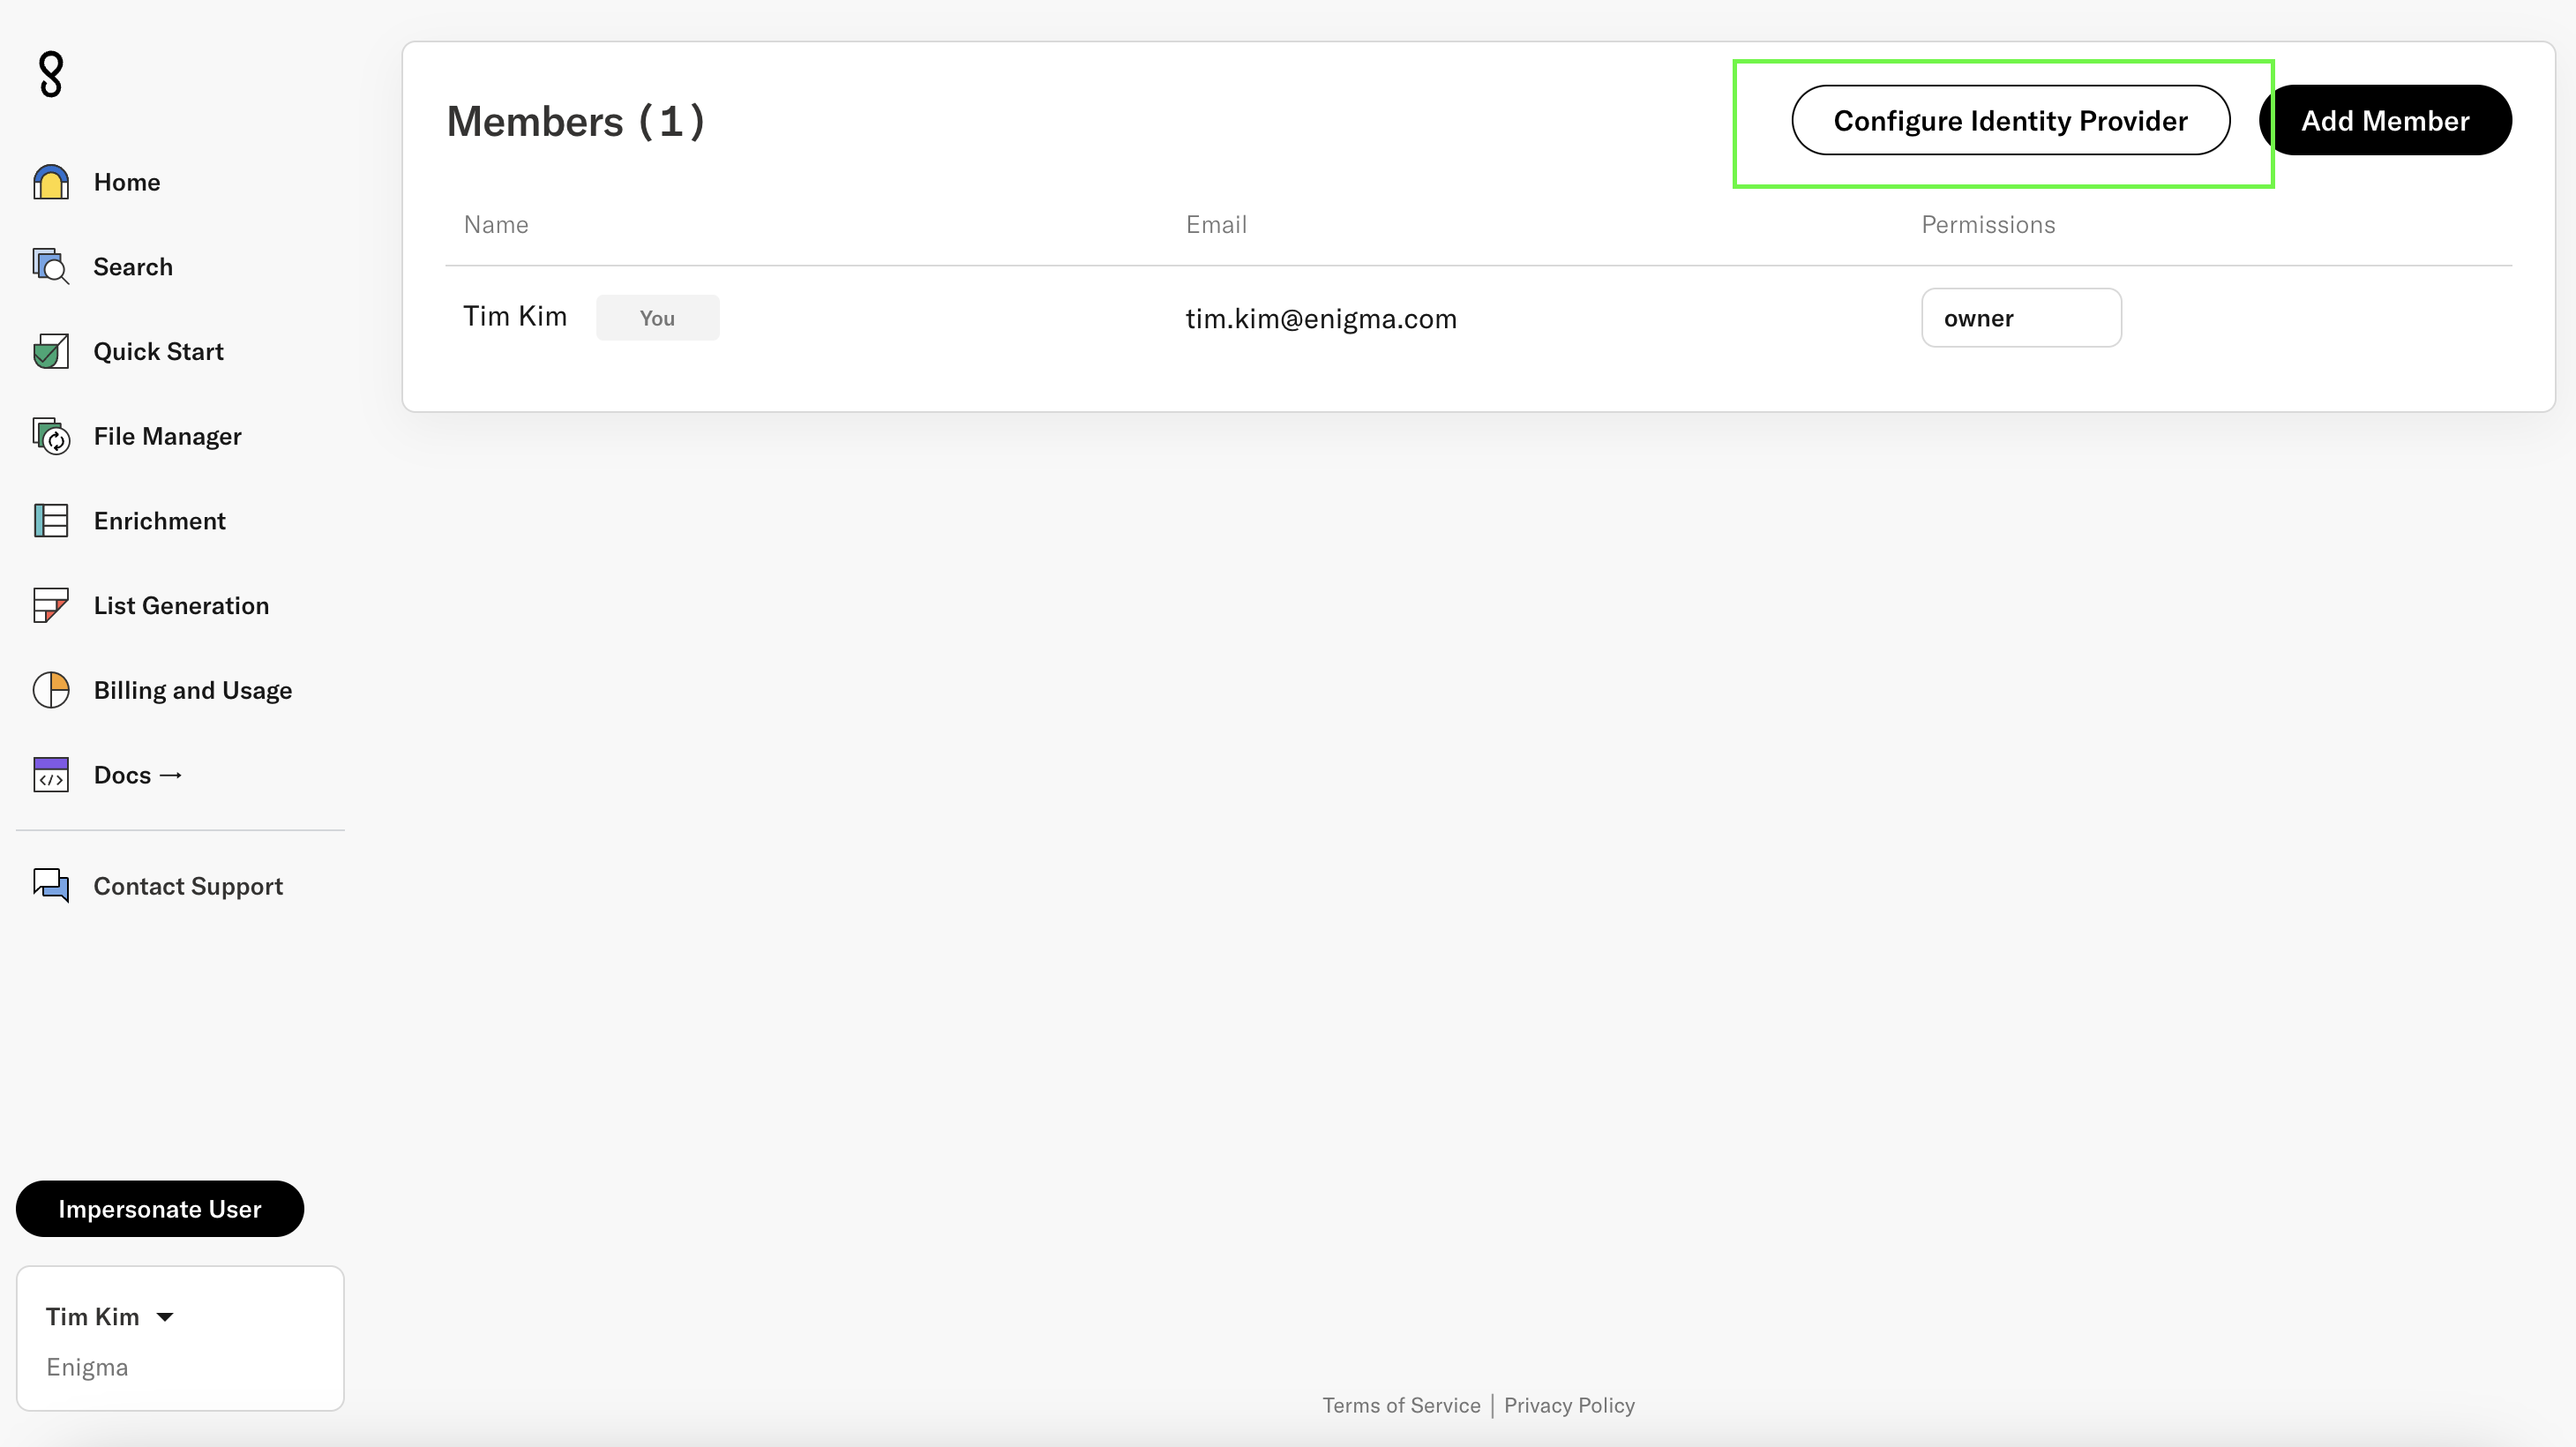
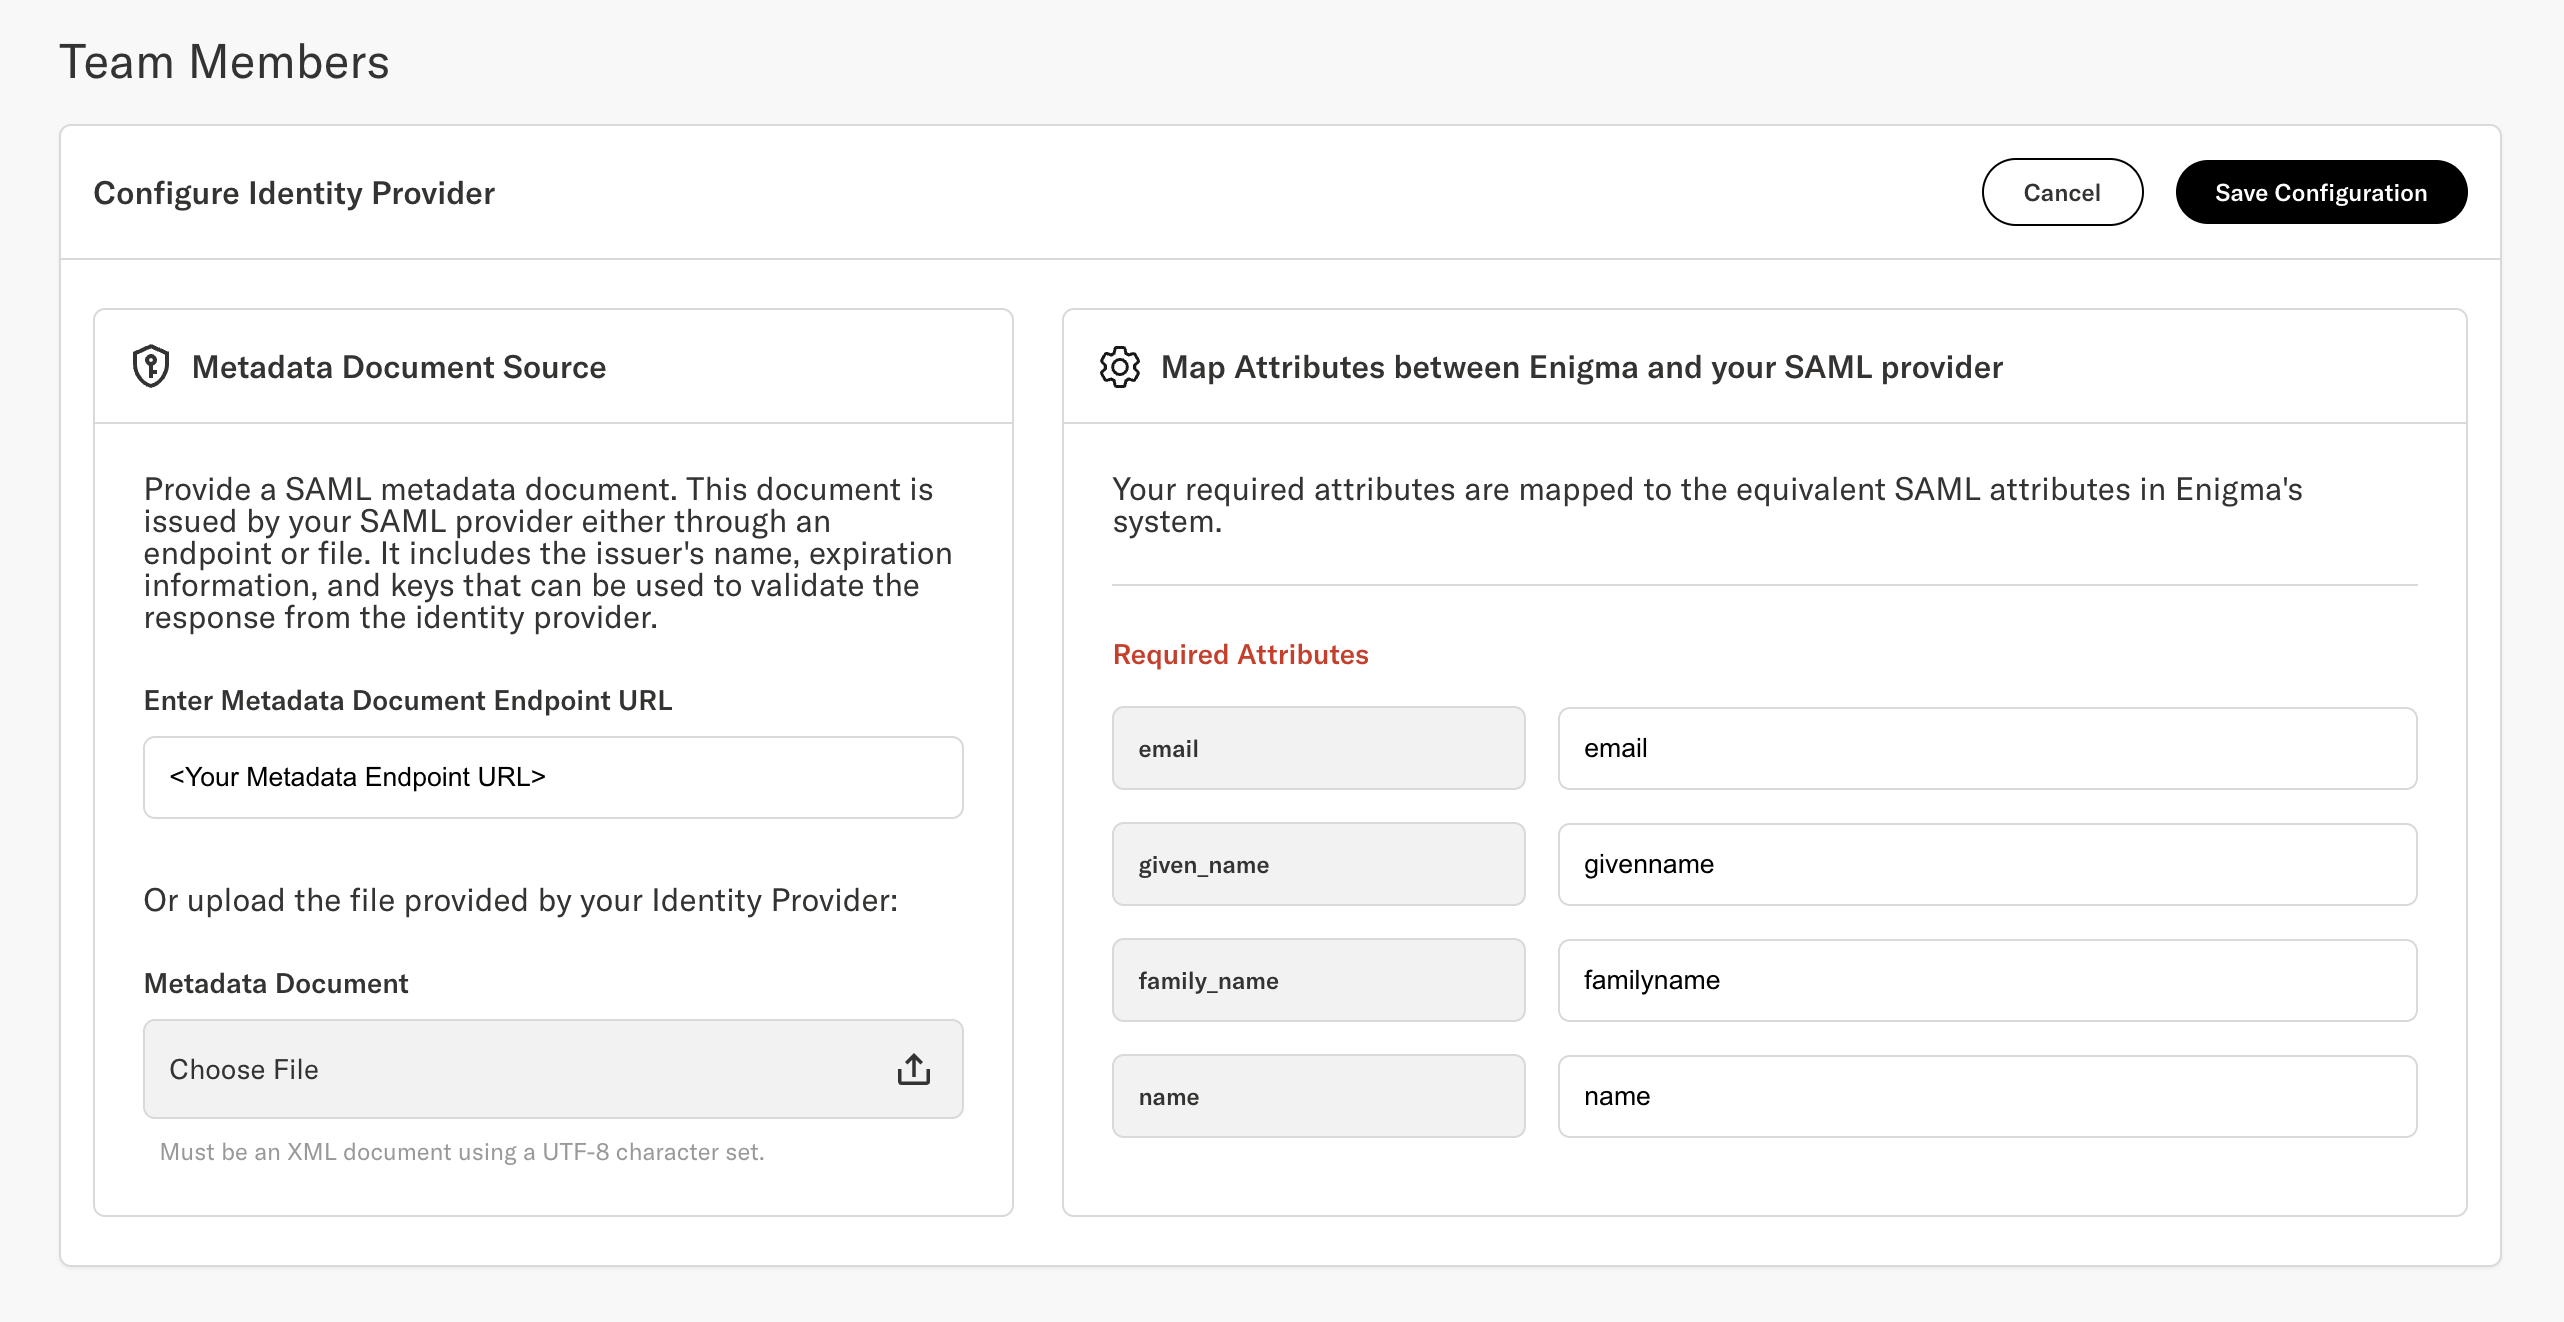
- Fill out all the fields in the form and click “Save Configuration”
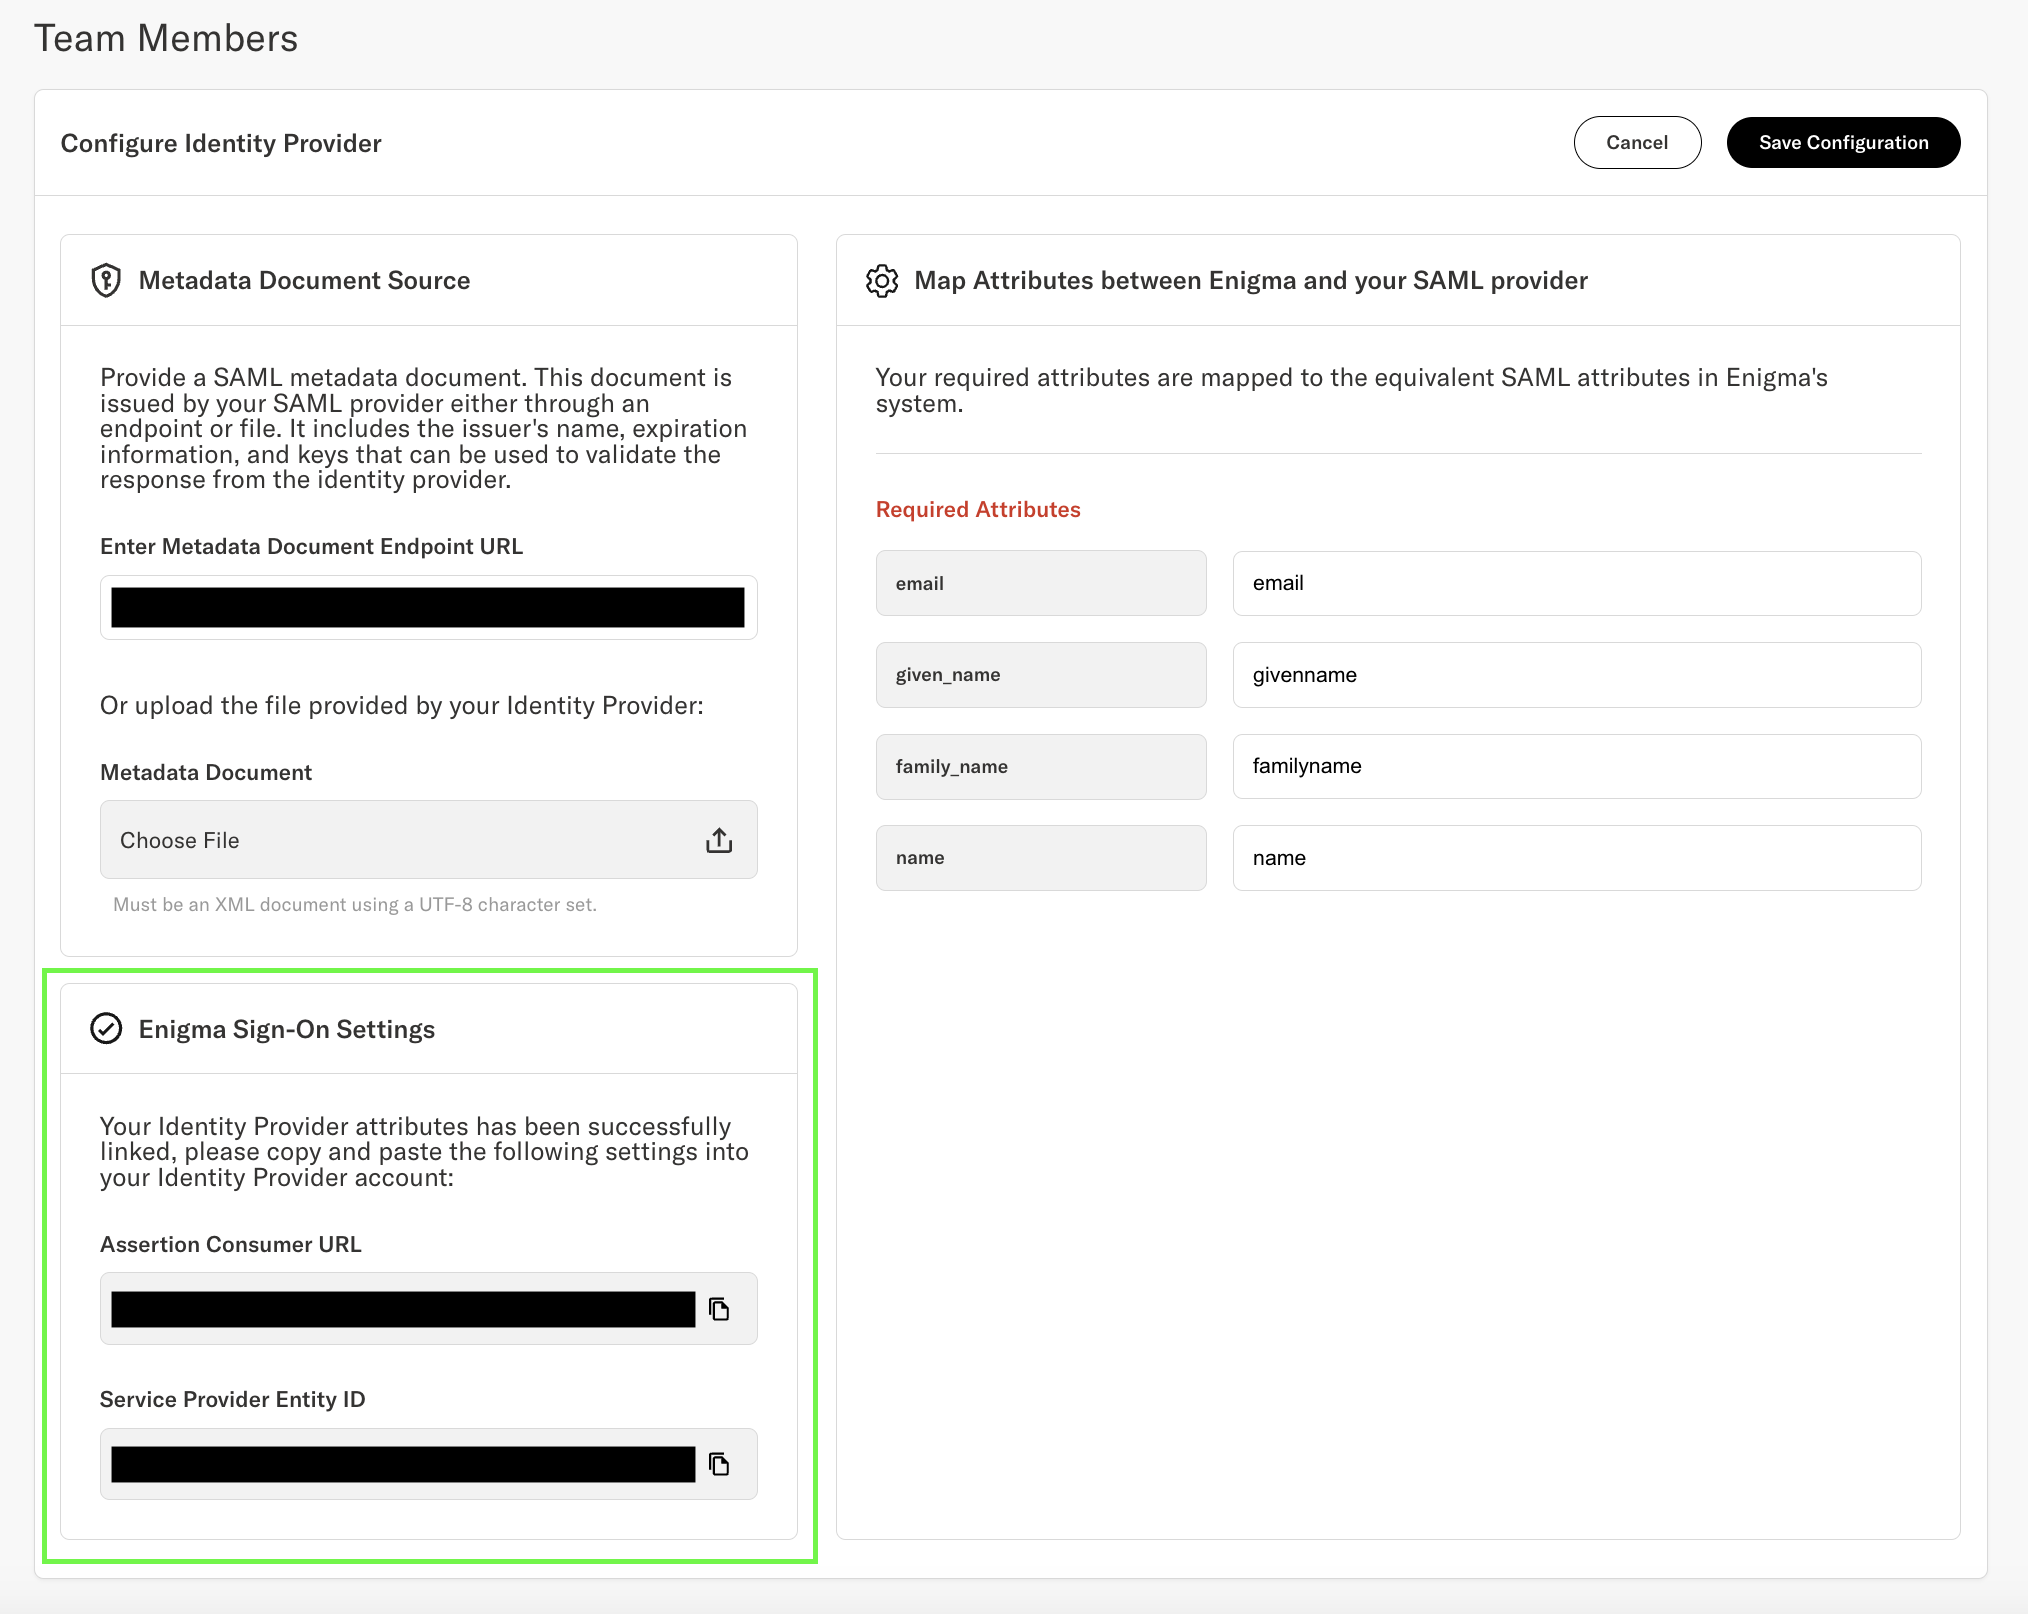
- Copy the values provided in the “Enigma Sign-On Settings” panel. These values will be used in the final step detailed in Configure Okta Part 2
Configure Okta Part 2
-
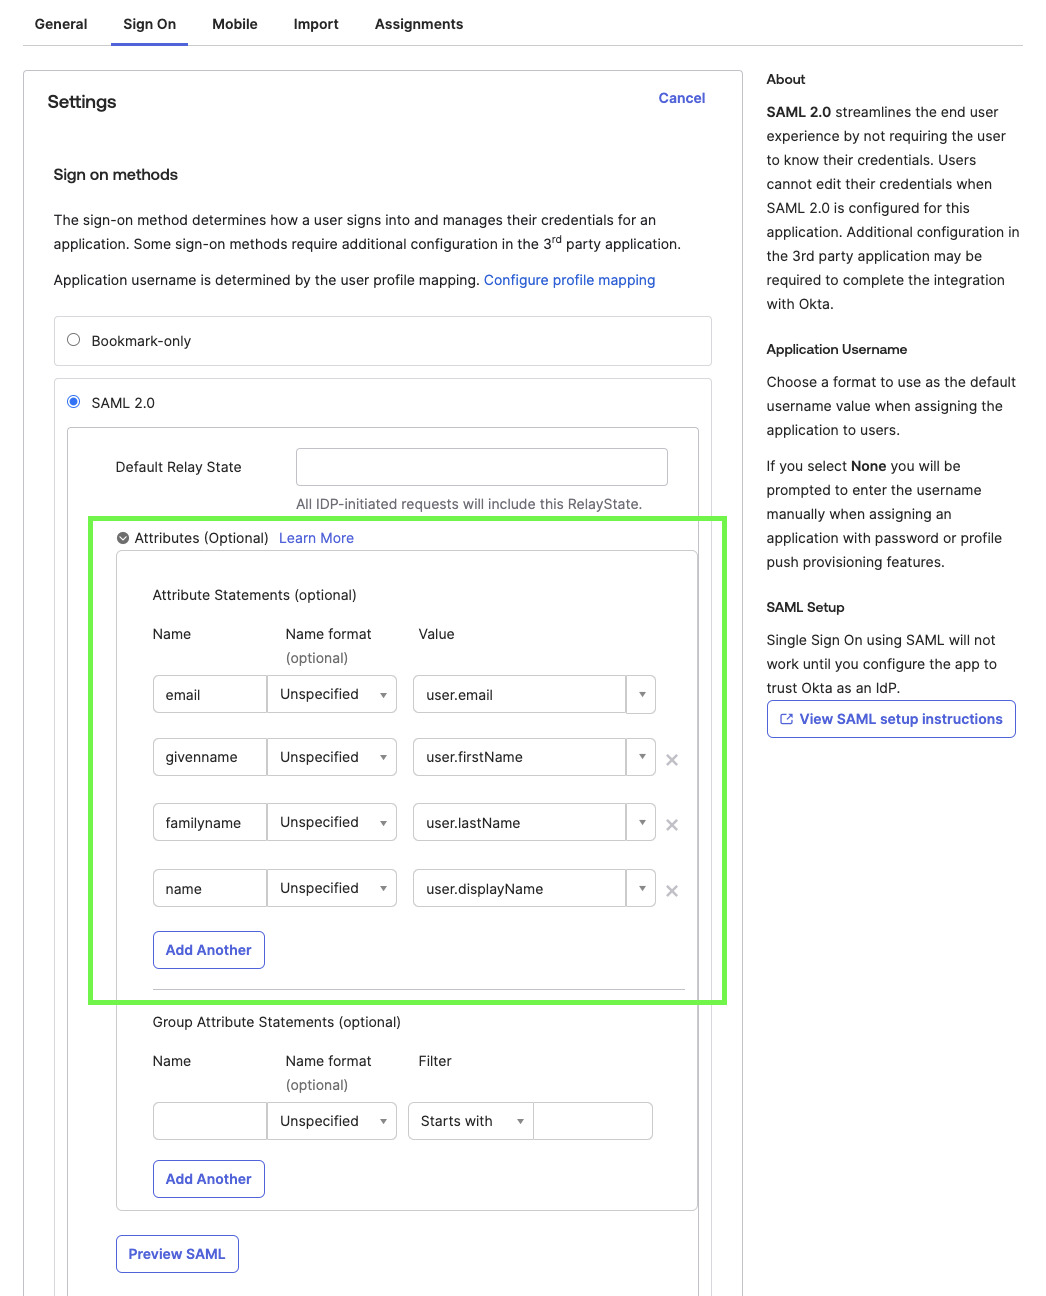
Return to your Okta SAML configuration tab.
-
Click “Edit” in the “Settings” panel and add attribute mappings for email, givenname, familyname, and name
-
Add the “Enigma Sign-On Settings” values to the SAML app
- Any users assigned to the SAML app will now be able to login through SSO from https://console.enigma.com/login-sso
Note: There is a slight propagation delay of a few minutes for the Enigma Console to recognize the onboarded identity provider. If logging in with SSO does not work immediately after following the above steps, wait a few minutes and try again.
Updated 5 months ago